Apple Cider Vinegar (ACV) and Honey are all the rage these days. Apparently they cure EVERYTHING from stomach problems to acne!
Well I don't know about that; but long before they became all the rage of the internet, I came across a book published in 1980 by Dian Dincin Buchman entitled Herbal Medicine, The Natural Way to Get Well and Stay Well. In the book she tells a story of a man who suffered from arthritis in his toe. She recommended he started drinking a combination of 1 t. apple cider vinegar and 1 T. of honey in a glass of water daily. A while later she ran into the gentleman and asked about his arthritis in his toe. He had forgotten about the pain because it was completely gone. He said he would continue this daily routine so it wouldn't come back.
After reading this, I mentioned it to my Mom. She was still quite young, but didn't want to get arthritis so she started drinking the ACV/Honey combination herself. She said she liked the taste and it was very refreshing. In fact, she told me that her dad, who was a farmer, would drink a vinegar water concoction in the summertime to cool off as lemons are expensive in Canada. She's been drinking this mixture for over 30 years now and she has no arthritis while her sister suffers from it a great deal.
Have you ever found yourself so thirsty that drinking water just doesn't seem to help? Personally, I enjoy the combination of ACV and Honey just as a refreshing drink during the summer and mix it up by the quart. I'm not very accurate with the measurements but rather put about 4 T. of ACV and 4 heaping tablespoons of honey in a quart jar and fill it with water. I've also experimented with **Blackberry Vinegar and Red Raspberry Vinegar. These also taste very good. It's like my own "vitamin" water.
So give it a try. Even if you think you don't like vinegar, you might be surprised at the taste. And the benefits are well worth making the consumption of this beverage a daily habit.
**I made the Blackberry Vinegar and Red Raspberry Vinegars last summer by crushing about 1 1/2 cups of fruit in a pint jar then filling the jar with some ACV that still contains the "mother" because it has not been pasteurized. I covered it with a fine cheese cloth to keep the bugs out. After several weeks in the warm weather, the juices from the fruit become vinegar. I pour it through a fine sieve and voila, I have vinegar.
Saturday, May 4, 2013
Thursday, March 28, 2013
The Fairytale Lie

Women's liberation and modern society have changed this expectation and modern authors have reflected that change in stories, movies and television. Now the Princess is just as likely to save herself without the Prince's assistance or even go one further and save the Prince.
As we grow up, we put all our hope in meeting Prince Charming, our Knight in Shining Armor (Sigh). Well, I believe we have all been lied to. I'm not saying there can't be a "happily ever after". I'm not saying that the Princess doesn't need a Knight once in awhile. We can't always be strong. I'm saying that the first "Knight in Shining Armor" in a girl's life should not be cast as the Prince. What I'm saying is they got the wrong guy as the first Knight.
You see I've had the privilege of knowing many a Knight in my life and I'm sure you have too if you really think about it. They often go by the name "King of the Realm" or Dad.
When I think back in life, I believed the Fairytale. I believed in it so strongly that I never realized I already had a Knight in my life. Once when I was 15, five drunk girls ganged up on me while I was babysitting. It was my first time working for this woman and her regular babysitter showed up with her friends to get drunk and get dolled up for a dance. As things escalated and got out of control, I managed to lock them out of the house just long enough to call my dad on the phone. We lived right around the block. Dad came blazing in ready to take on all comers and soon he had me safely home. I know there were other incidents in life when Dad stepped up to the roll of Knight too.
My generation saw a peak in divorce rates and for awhile it seemed that almost all children were placed with their mothers to be raised while only seeing their fathers a few days a month. Thankfully that trend is starting to even out with equal custody. This didn't stop my husband from fulfilling his roll as Knight though. For example, when our very independent daughter needed financial aid in college, my husband is the one who stepped up and said we would help her.
My brother followed in Dad's footsteps with his own daughters, giving them a place to live with their children when they had no money and no place to go.
Dad is gone now, but I still have a Knight in my life - he just happens to also be my Prince Charming. So think about it. Who are the Knights in your life?

Wednesday, February 27, 2013
Ugly To Beautiful
Several years ago I was part of a small group of women who made children's quilts for an orphanage in Cambodia. Before that I had never attempted to make a quilt because I thought it was too time consuming. I learned a few things through that endeavor. First of all, you don't have to hand sew quilts (unless you're a quilting snob); you can sew them on a sewing machine. Second is that they don't have to be composed of thousands of fabric pieces. In fact the definition of a quilt is two pieces of material with some kind of filler sandwiched in between and then held together by stitches. So you can actually make a quilt with larger pieces sewn together and it doesn't take very long. Finally, I learned I was pretty good at designing simple quilt tops from donated fabric.
Now I love combining beautiful fabric into quilt tops. Unfortunately, I don't necessarily enjoy the rest of the quilt making process; but that's part of making a quilt. One of my other faults is that I get bored with anything that becomes tedious and takes lots of time. I tried 'hooking' a wall hanging once. Just one of many boring projects which remained incomplete. So I mostly make baby quilts. They're fast enough and not too large to handle on my sewing machine.
Have you heard the story of the ugly duckling. No? Well basically a poor little ugly "duckling" was really a swan and turned out to be very beautiful. Did you know that an ugly piece of fabric can be just like that ugly duckling? Yes, even that ugly fabric can be turned into a beautiful swan of a quilt. Here's an example.
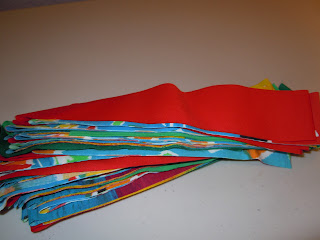
 Ugly right? And a baby quilt? The other piece of fabric was nearly as bad, but I forgot to take a picture. Why use these if I thought they were so ugly? I wanted something bright and colorful. I was making a quilt for a baby boy and most of the fabric in my stash (some is still from donations like this one) would work better for a little girl. But everyone seems to be having boys these days.
So here is a pictorial of the quilt I made. I used a bargello technique to an extent.
 First I cut the fabrics into strips - all the same width. Then I sewed them together in random order. I worked in sections and then put those together. I used a 1/4 inch seam allowance and ironed the seams flat. Believe me when I say that the iron is your best friend when quilting.


Place you two pieces along the masking tape guide and you'll get a good 1/4 inch seam.


 Next you'll cut the strips crosswise. They should be different widths increasing by 1/4 to 1/2 inch increments.
 Next you want to move the strips up or down one position so they step up or down.

 When ironing the seam allowances, you want them in opposing directions so they snug up to one another. This kind of locks them together and makes sure you get a good match at the seam.

Once all the strips are sewn together, remove one seam crosswise and open up. You can see the effect you get by cutting the crosswise strips different widths.
Next I sandwiched the top to the bottom with a layer of batting in the middle. The backing will lie face down with the top face up. Now it was time to baste the layers all together to hold everything in place until it's quilted. My fingers aren't used to using a needle so extensively and I couldn't get the hang of using a thimble, so I used multiple layers of masking tape. Worked really well!
Once everything is sandwiched together. It's time to quilt. I'm not going into detail here except to say that I decided to do a random quilting design which is easiest and the most forgiving of mistakes.
 Finally I added a binding and this is the finished article. Beautiful right? At least I think so.
There are lots of good videos on YouTube and great books available about quilting if you're interested in learning more. I would recommend one book that has helped me with the basics and plenty of helpful tips. The book is Better Homes and Gardens Complete Guide to Quilting.
Now I love combining beautiful fabric into quilt tops. Unfortunately, I don't necessarily enjoy the rest of the quilt making process; but that's part of making a quilt. One of my other faults is that I get bored with anything that becomes tedious and takes lots of time. I tried 'hooking' a wall hanging once. Just one of many boring projects which remained incomplete. So I mostly make baby quilts. They're fast enough and not too large to handle on my sewing machine.
Have you heard the story of the ugly duckling. No? Well basically a poor little ugly "duckling" was really a swan and turned out to be very beautiful. Did you know that an ugly piece of fabric can be just like that ugly duckling? Yes, even that ugly fabric can be turned into a beautiful swan of a quilt. Here's an example.

So here is a pictorial of the quilt I made. I used a bargello technique to an extent.


Mark your edge line with several layers of masking tape.


Place you two pieces along the masking tape guide and you'll get a good 1/4 inch seam.
 |
| All the strips sewn together in random order. |
 |
| This is what the back will look like. |

The ends may not be even, but that's okay, you'll trim that off.
I sewed the last strip to the first strip so it made a big loop of material.


Once all the strips are sewn together, remove one seam crosswise and open up. You can see the effect you get by cutting the crosswise strips different widths.
Next I sandwiched the top to the bottom with a layer of batting in the middle. The backing will lie face down with the top face up. Now it was time to baste the layers all together to hold everything in place until it's quilted. My fingers aren't used to using a needle so extensively and I couldn't get the hang of using a thimble, so I used multiple layers of masking tape. Worked really well!
 | ||||||
| The other great use of masking tape is as thimbles. |
 |
| This shows front and back after quilting. I always leave the excess batting and backing until after quilting is completed and then trim the edges to be even and squared. |
 |
| Front close up. |
 |
| Close up of the back. I chose to quilt around the little dinosaurs. |

There are lots of good videos on YouTube and great books available about quilting if you're interested in learning more. I would recommend one book that has helped me with the basics and plenty of helpful tips. The book is Better Homes and Gardens Complete Guide to Quilting.
Saturday, February 16, 2013
My Bathroom Counter Top

Let me break it down for you:


 |
| Dry thyme. |


Body Butter
1 cup shea butter
1/2 cup coconut oil
1/2 cup almond oil (you can substitute olive oil, jojoba oil, any organic, liquid oil that is healthy.)
1/2 cup coconut oil
1/2 cup almond oil (you can substitute olive oil, jojoba oil, any organic, liquid oil that is healthy.)
Essential oil of choice (lavender
oil)
Instructions
1. Melt shea butter and coconut oil in the top of a double
boiler. Remove from heat and let cool for 30 minutes.
2. Stir in almond oil and add 30 – 35 drops
of Lavender oil.
3. Wait until oils start to partially solidify, then whip until a butter-like consistency is achieved. This should only take a few minutes.
4. Place in clean, glass jars and enjoy! A little goes a long way. (Makes about 4 cups.)

Lotion
1/2 cup almond or olive oil (can infuse with herbs
first if desired)1/4 cup coconut oil
1/4 cup beeswax pellets
Optional: 1 teaspoon Vitamin E oil
Optional: 2 tablespoons Shea Butter or Cocoa Butter (I used Shea Butter)
Optional: Essential Oils - I used Lavender as it's my favorite
How
to Make Lotion:
- Combine ingredients in a pint sized or larger glass jar. I have a mason jar that I keep just for making lotions and lotion bars, or you can even reuse a glass jar from pickles, olives or other foods.
- Fill a medium saucepan with a couple inches of water and place over medium heat.
- Put a lid on the jar loosely and place in the pan with the water.
- As the water heats, the ingredients in the jar will start to melt. Shake or stir occasionally to incorporate. When all ingredients are completely melted, pour into whatever jar or tin you will use for storage. Small mason jars (8 ounce) are great for this. It will not pump at all in a lotion pump!
- Use as you would regular lotion. This has a longer shelf life than some homemade lotion recipes since all ingredients are already shelf stable and not water is added. Use within 6 months for best moisturizing benefits.

 Two main essential oils I use regularly. Tea Tree Oil is a great germ killer - it's smells like Pine Sol. Usually they warn not to use Tea Tree Oil directly but mix with another "carrier" oil, but I will dip a Q-tip in it and dab on my pimples. They usually dry up within a day or two. The other essential oil pictured is Peppermint Oil.
Bleach Alternative
12 cups water
1/4 cup lemon juice
1 cup hydrogen peroxide
Mix. Add 2 cups per wash load or put in spray bottle and use as a household cleaner.

Subscribe to:
Posts (Atom)