Wednesday, February 27, 2013

Ugly To Beautiful

Several years ago I was part of a small group of women who made children's quilts for an orphanage in Cambodia. Before that I had never attempted to make a quilt because I thought it was too time consuming. I learned a few things through that endeavor. First of all, you don't have to hand sew quilts (unless you're a quilting snob); you can sew them on a sewing machine. Second is that they don't have to be composed of thousands of fabric pieces. In fact the definition of a quilt is two pieces of material with some kind of filler sandwiched in between and then held together by stitches. So you can actually make a quilt with larger pieces sewn together and it doesn't take very long. Finally, I learned I was pretty good at designing simple quilt tops from donated fabric.

Now I love combining beautiful fabric into quilt tops. Unfortunately, I don't necessarily enjoy the rest of the quilt making process; but that's part of making a quilt. One of my other faults is that I get bored with anything that becomes tedious and takes lots of time. I tried 'hooking' a wall hanging once. Just one of many boring projects which remained incomplete. So I mostly make baby quilts. They're fast enough and not too large to handle on my sewing machine.

Have you heard the story of the ugly duckling. No? Well basically a poor little ugly "duckling" was really a swan and turned out to be very beautiful. Did you know that an ugly piece of fabric can be just like that ugly duckling? Yes, even that ugly fabric can be turned into a beautiful swan of a quilt. Here's an example.
Ugly right? And a baby quilt? The other piece of fabric was nearly as bad, but I forgot to take a picture. Why use these if I thought they were so ugly? I wanted something bright and colorful. I was making a quilt for a baby boy and most of the fabric in my stash (some is still from donations like this one) would work better for a little girl. But everyone seems to be having boys these days.

So here is a pictorial of the quilt I made. I used a bargello technique to an extent.
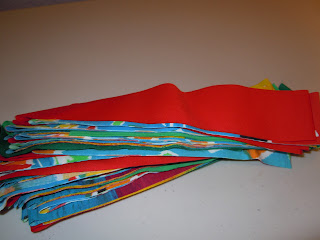
First I cut the fabrics into strips - all the same width. Then I sewed them together in random order. I worked in sections and then put those together. I used a 1/4 inch seam allowance and ironed the seams flat. Believe me when I say that the iron is your best friend when quilting.

Mark your edge line with several layers of masking tape.


Place you two pieces along the masking tape guide and you'll get a good 1/4 inch seam.

All the strips sewn together in random order.

This is what the back will look like.
 
The ends may not be even, but that's okay, you'll trim that off.

I sewed the last strip to the first strip so it made a big loop of material.


Next you'll cut the strips crosswise. They should be different widths increasing by 1/4 to 1/2 inch increments.

Next you want to move the strips up or down one position so they step up or down.


When ironing the seam allowances, you want them in opposing directions so they snug up to one another. This kind of locks them together and makes sure you get a good match at the seam.
 

Once all the strips are sewn together, remove one seam crosswise and open up. You can see the effect you get by cutting the crosswise strips different widths.

Next I sandwiched the top to the bottom with a layer of batting in the middle. The backing will lie face down with the top face up. Now it was time to baste the layers all together to hold everything in place until it's quilted. My fingers aren't used to using a needle so extensively and I couldn't get the hang of using a thimble, so I used multiple layers of masking tape. Worked really well!

The other great use of masking tape is as thimbles.


 Once everything is sandwiched together. It's time to quilt. I'm not going into detail here except to say that I decided to do a random quilting design which is easiest and the most forgiving of mistakes.

This shows front and back after quilting. I always leave the excess batting and backing until after quilting is completed and then trim the edges to be even and squared.

Front close up.

Close up of the back. I chose to quilt around the little dinosaurs.


Finally I added a binding and this is the finished article. Beautiful right? At least I think so. 

There are lots of good videos on YouTube and great books available about quilting if you're interested in learning more. I would recommend one book that has helped me with the basics and plenty of helpful tips. The book is Better Homes and Gardens Complete Guide to Quilting.

Saturday, February 16, 2013

My Bathroom Counter Top

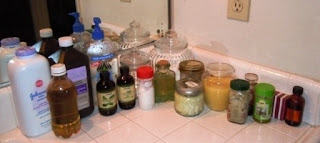
So what's on your bathroom counter top? Or do you hide all your skincare products? Anyway, this is what mine looks like. Some might think this should be in my kitchen at first glance, but that's only because I recycle my containers.

Let me break it down for you:
 Nope, not pickling spice. This is a mix of 25% castor oil and 75% sweet almond oil. I started using this to clean my skin once a week. The idea is that the oil dissolves the 'gunk' in your pores. I apply it to my skin and massage it in. I let it sit for awhile. Then I use very warm water on a wash cloth or just steam to open pores even further and gently wipe away the oil. I'll try this out for a few weeks and see if it helps. I'm also thinking about adding some Thyme to the oil to add it's properties to the oil. Here's a link with more information: http://www.theoilcleansingmethod.com/

Dry thyme.

This is my skin toner. It's Witch-hazel to which I added Thyme Tincture. Thyme is an herb that's said to be good for acne and I have adult acne thanks to my Dad. (A tincture is any herb that's been infused -soaked for a least a few weeks- in alcohol. I usually use a cheap vodka.) 

 I know it says celery seed on the bottle, but it's really a combination of coconut oil and sweet almond oil. I use this to moisturize my face. I added some lavender oil, but I won't next time as it irritates my eyes. I may add some comfrey oil though for additional healing properties.

 Aloe Vera gel without added alcohol. I apply this to my face after adding my moisturizing oil. I also apply to my underarms after my shower to kill bad odor germs. Then of course it can always be used on a sunburn or any burn for that matter.

This former spice bottle contains my "toothpaste". I started out just using straight coconut oil which is white and solid at cool room temperatures. Recently I added a little baking soda, salt, hydrogen peroxide and peppermint oil. Even though coconut oil will whiten your teeth on it's own, I added the baking soda and salt to help clean the tea stains from my teeth and because I'm impatient. Next time I'll leave the salt out - it's just too abrasive. (Warning: Don't brush too hard or you'll abrade your gums.) I'm not sure if there's any hydrogen peroxide left in this mix because after mixing in the bottle, it overflowed all over the counter. The reason I quit using regular toothpaste is because I started canker sores in my mouth and upon research found that some toothpastes actually have ingredients that cause canker sores. Ewww. Not for me.

This is about 25% Apple Cider Vinegar with water to dilute. I added a few drops of Peppermint Oil this time, but I don't always add the peppermint because I really don't mind the taste of ACV. I use this to rinse my mouth after brushing my teeth. It kills any leftover germs. Then I rinse with plain water so the acidic vinegar doesn't eat away my tooth enamel.


This is body butter. This was fun to make and I thought I blew it, but it worked out after all. This leaves your skin so soft. Here's the recipe for this:


Body Butter
1 cup shea butter
1/2 cup coconut oil
1/2 cup almond oil (you can substitute olive oil, jojoba oil, any organic, liquid oil that is healthy.)
Essential oil of choice (lavender oil)
 Instructions
1. Melt shea butter and coconut oil in the top of a double boiler. Remove from heat and let cool for 30 minutes.
2. Stir in almond oil and add 30 – 35 drops of Lavender oil.

3. Wait until oils start to partially solidify, then whip until a butter-like consistency is achieved. This should only take a few minutes.
4. Place in clean, glass jars and enjoy! A little goes a long way. (Makes about 4 cups.)


This is lotion... or it's supposed to be. When I wrote down the simple recipe I doubled the bees  wax. Whoops. I added some oil, but it could use a little more. Actually, once the weather warms up, it will probably be fine as it is. The lotion seems oily when you apply it, but it absorbs right in and "dries" soon. Here's the recipe if you're interested:


 Lotion
1/2 cup almond or olive oil (can infuse with herbs first if desired)
1/4 cup coconut oil
1/4 cup beeswax pellets
Optional: 1 teaspoon Vitamin E oil
Optional: 2 tablespoons Shea Butter or Cocoa Butter (I used Shea Butter)
Optional: Essential Oils - I used Lavender as it's my favorite

How to Make Lotion:
  1. Combine ingredients in a pint sized or larger glass jar. I have a mason jar that I keep just for making lotions and lotion bars, or you can even reuse a glass jar from pickles, olives or other foods.
  2. Fill a medium saucepan with a couple inches of water and place over medium heat.
  3. Put a lid on the jar loosely and place in the pan with the water.
  4. As the water heats, the ingredients in the jar will start to melt. Shake or stir occasionally to incorporate. When all ingredients are completely melted, pour into whatever jar or tin you will use for storage. Small mason jars (8 ounce) are great for this. It will not pump at all in a lotion pump!
  5. Use as you would regular lotion. This has a longer shelf life than some homemade lotion recipes since all ingredients are already shelf stable and not water is added. Use within 6 months for best moisturizing benefits.

 That little stopper in the back is a bottle of comfrey tincture which I use for healing skin.


Two main essential oils I use regularly. Tea Tree Oil is a great germ killer - it's smells like Pine Sol. Usually they warn not to use Tea Tree Oil directly but mix with another "carrier" oil, but I will dip a Q-tip in it and dab on my pimples. They usually dry up within a day or two. The other essential oil pictured is Peppermint Oil.

 Hydrogen Peroxide - great for disinfecting surfaces and brightening whites without using toxic chlorine bleach.


Bleach Alternative
12 cups water
1/4 cup lemon juice
1 cup hydrogen peroxide

Mix. Add 2 cups per wash load or put in spray bottle and use as a household cleaner.
Ah, my baby powder. My concession to typical over-the-counter products. I just can't be comfortable after a shower without some baby powder. But at least it's lavender scented.